Don’t you know the feeling when you’re just on cloud 7 with your Amiga?
Maybe you remember the action replay for Amiga 500 which let you scan memory for lives and mods? Or you miss a nice and handy debugger when debugging that latest 68000 assembly of yours?
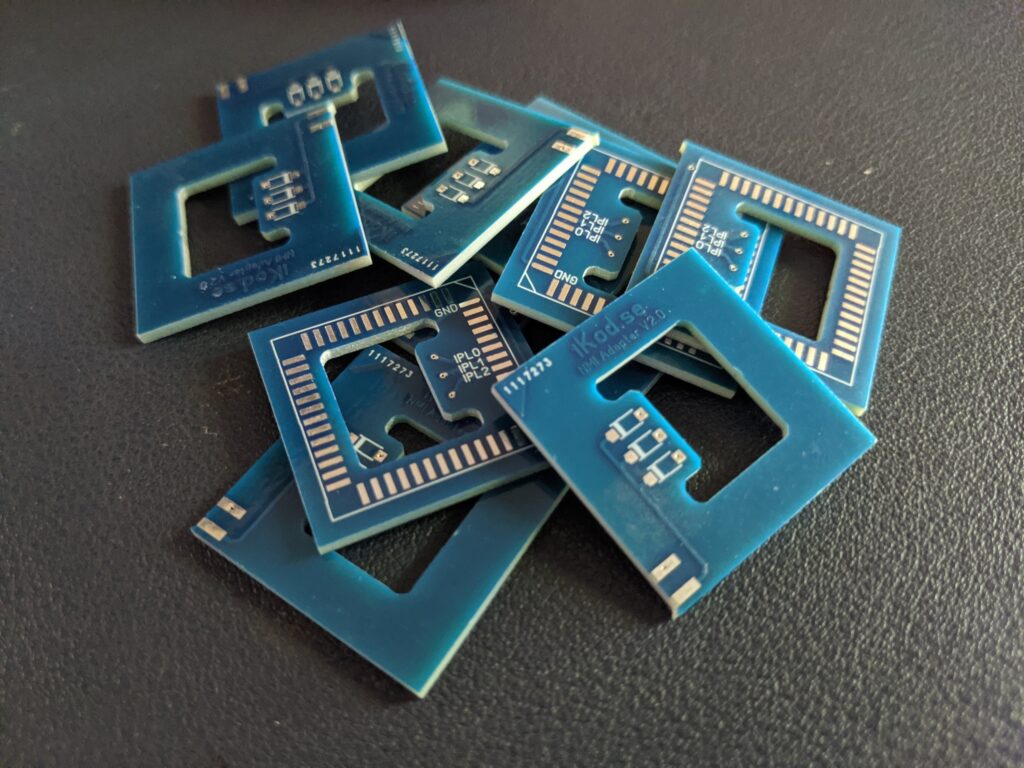
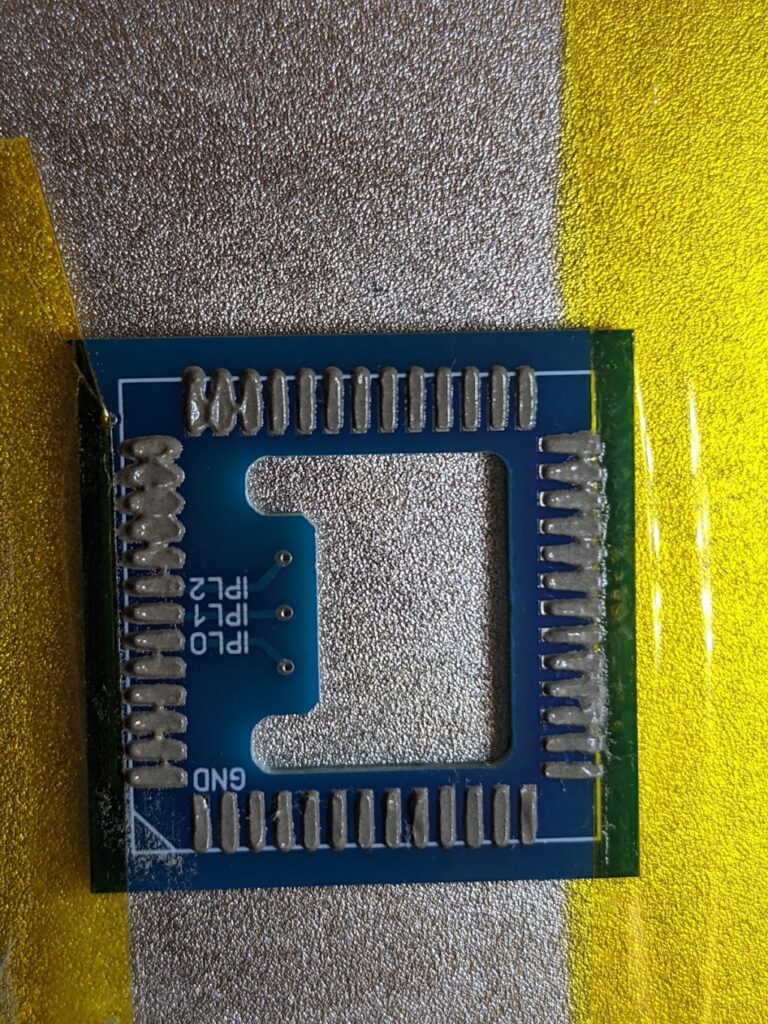
ikod.se had the right solution for your Amiga 1200 or 4000: an int 7 adapter. It is easily assembled with only a 52pin PLCC socket, 3 1n4148 diodes and a pin header and switch.
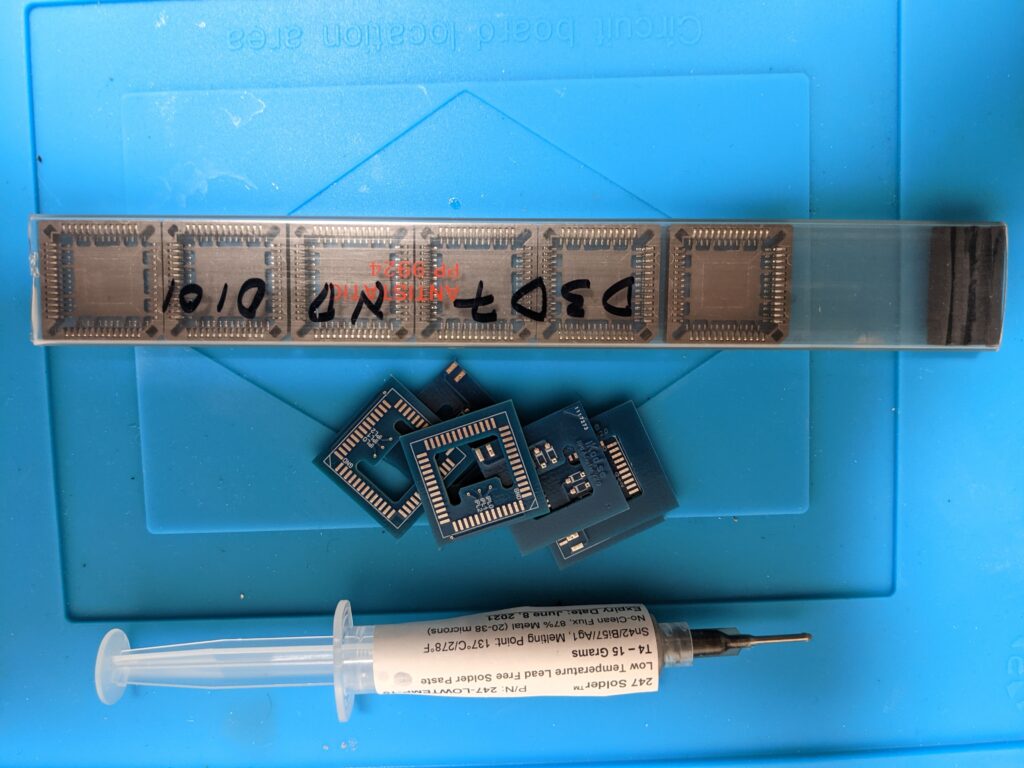
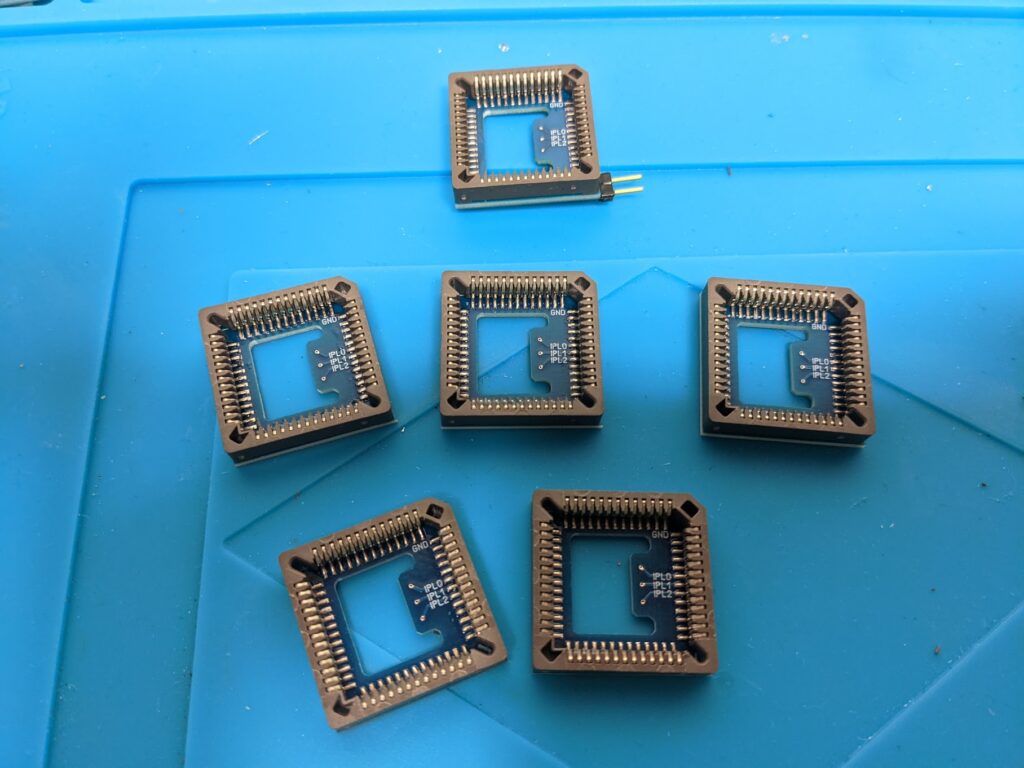
The thing is, it’s hardly worth, or even possible, to order anything in single quantities when doing PCBs. The price for 10 might just be the same. So let’s find solace in the soothing effects of soldering
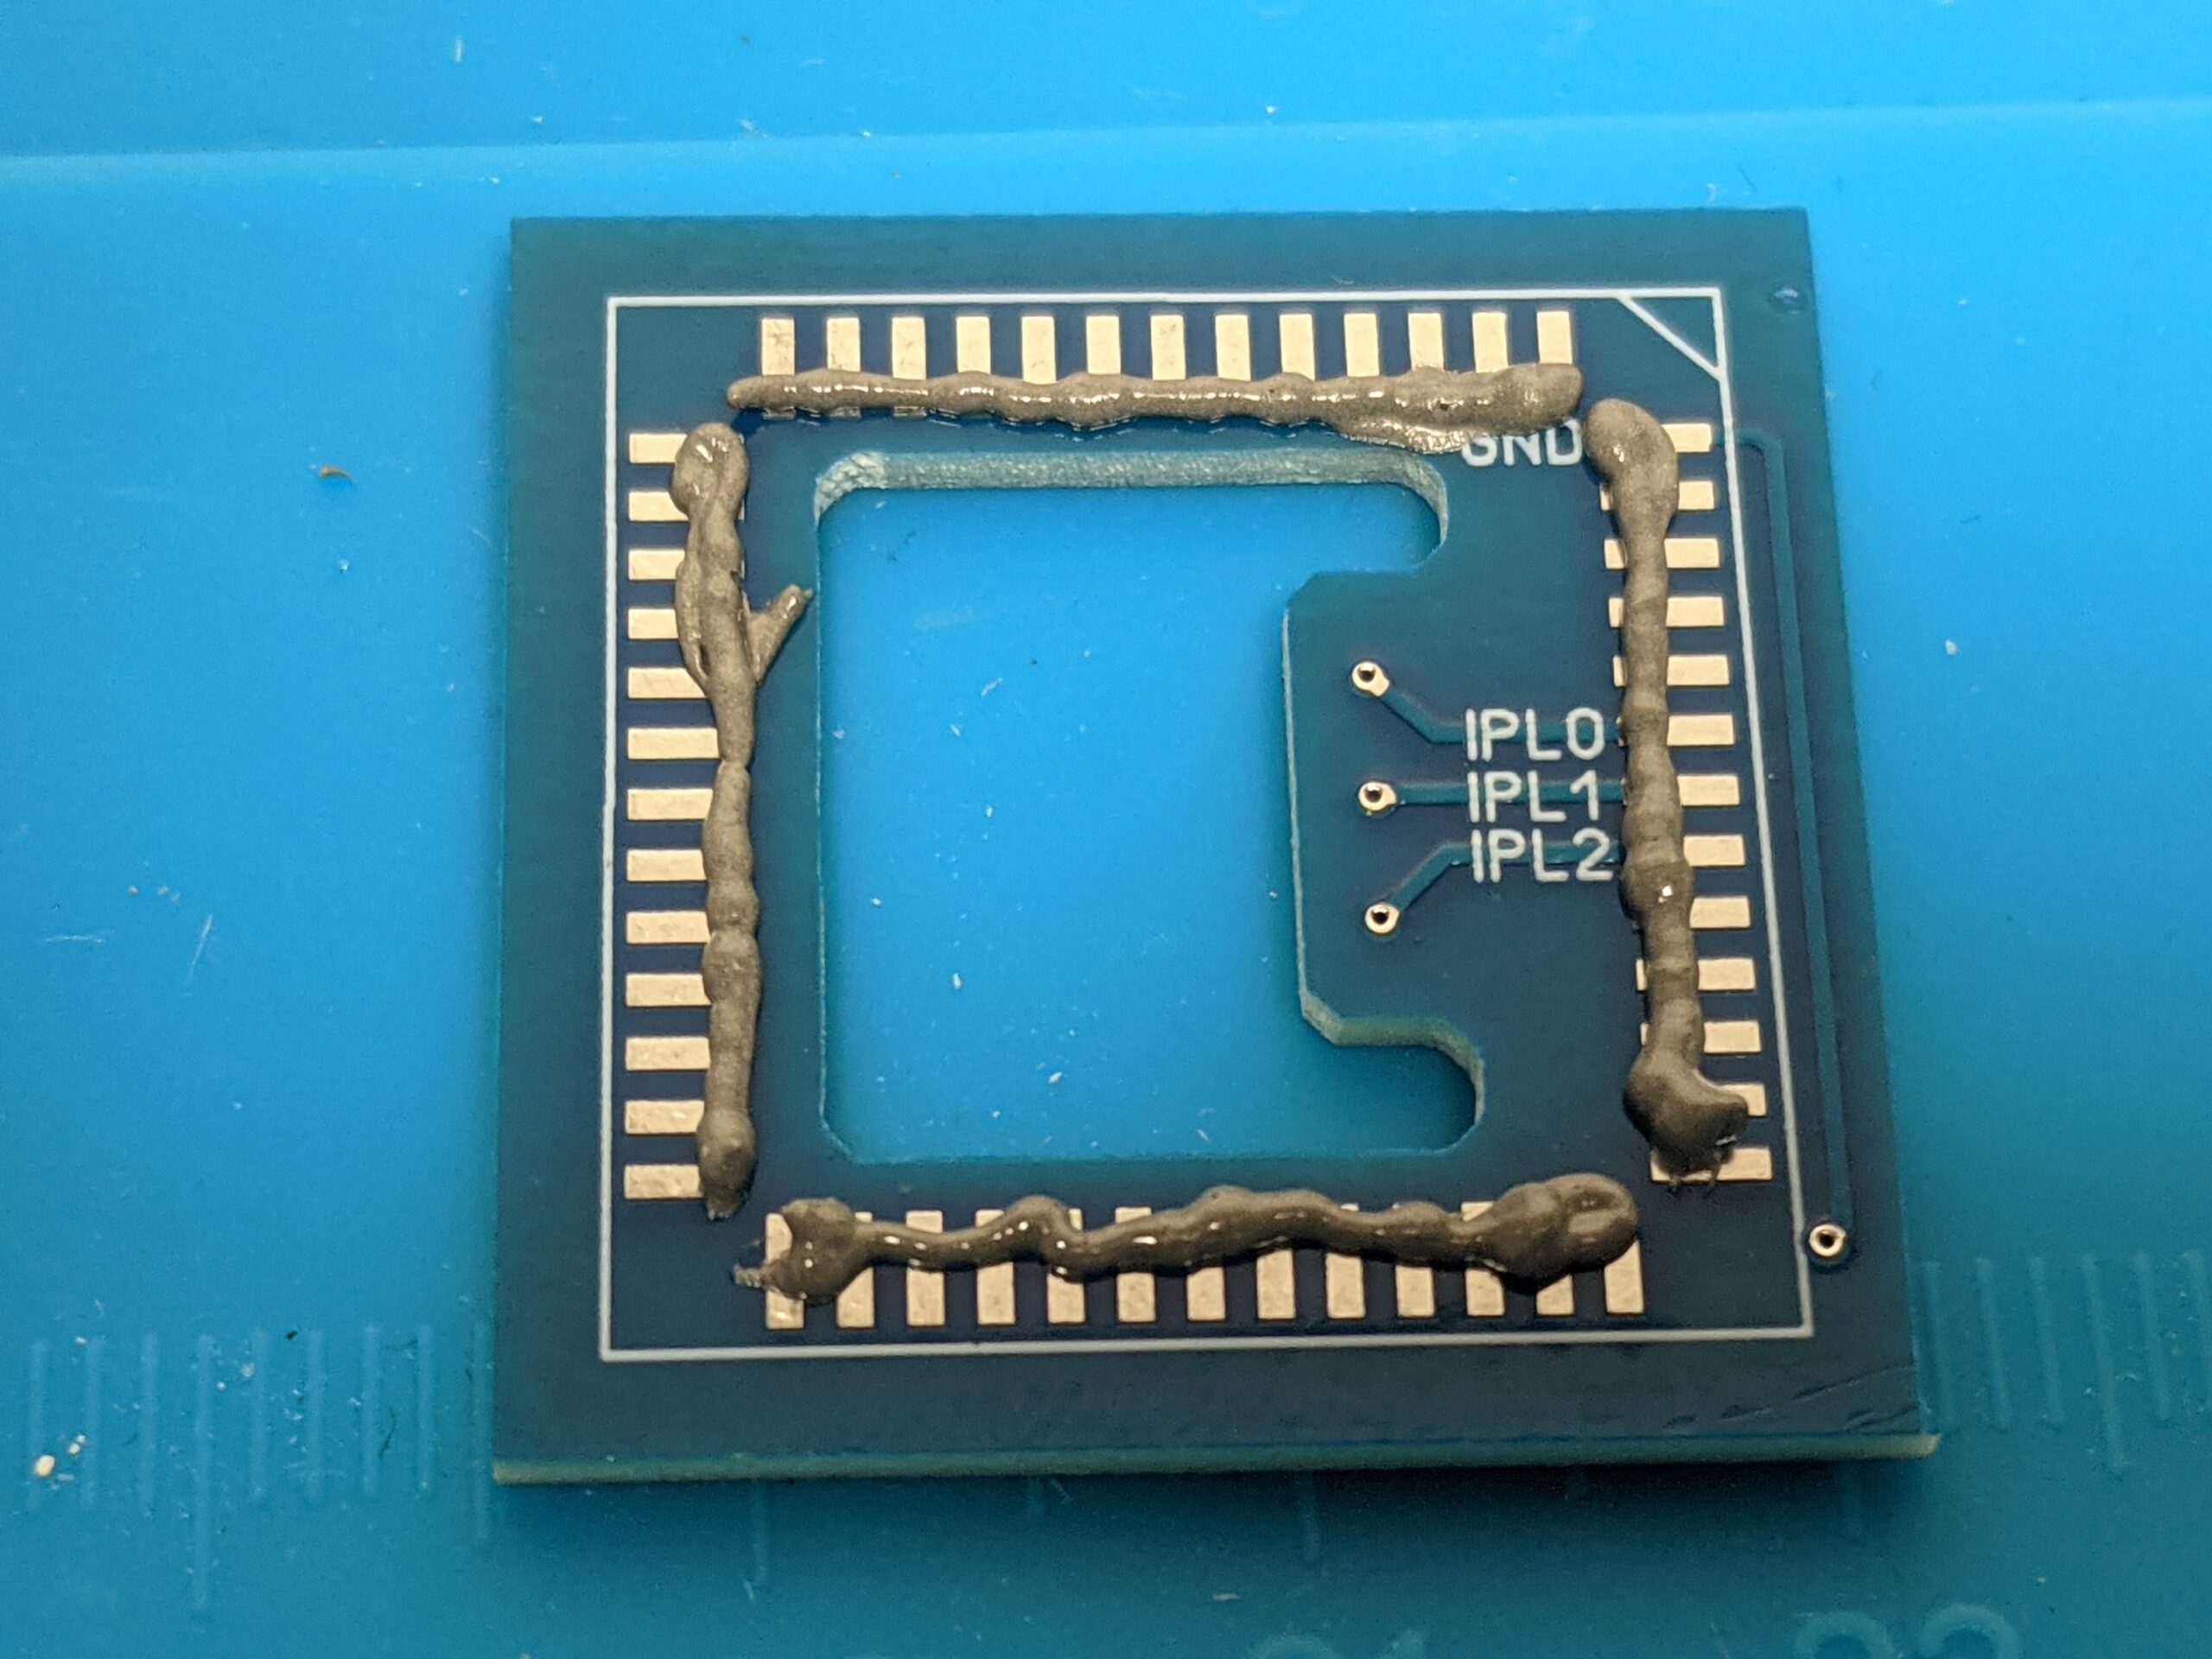
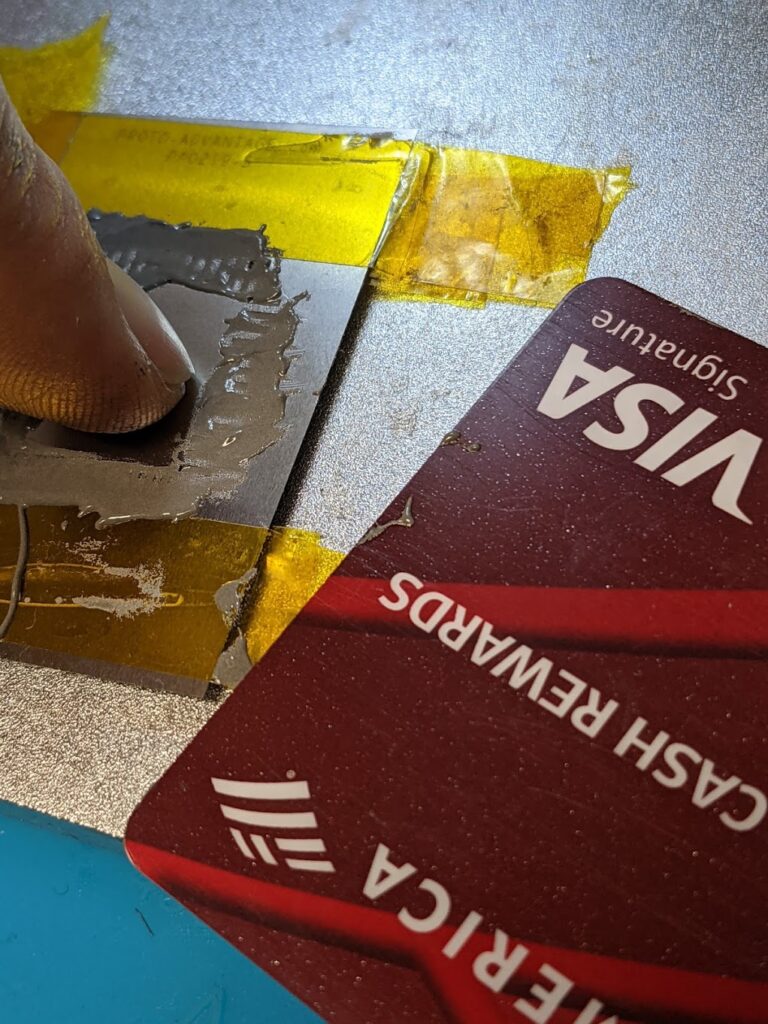
This was one of the projects that I used to practice working with solder paste and hot air. In the picture above I used a little bit too much in some places.
Let’s get to work and make a few of these thingies…
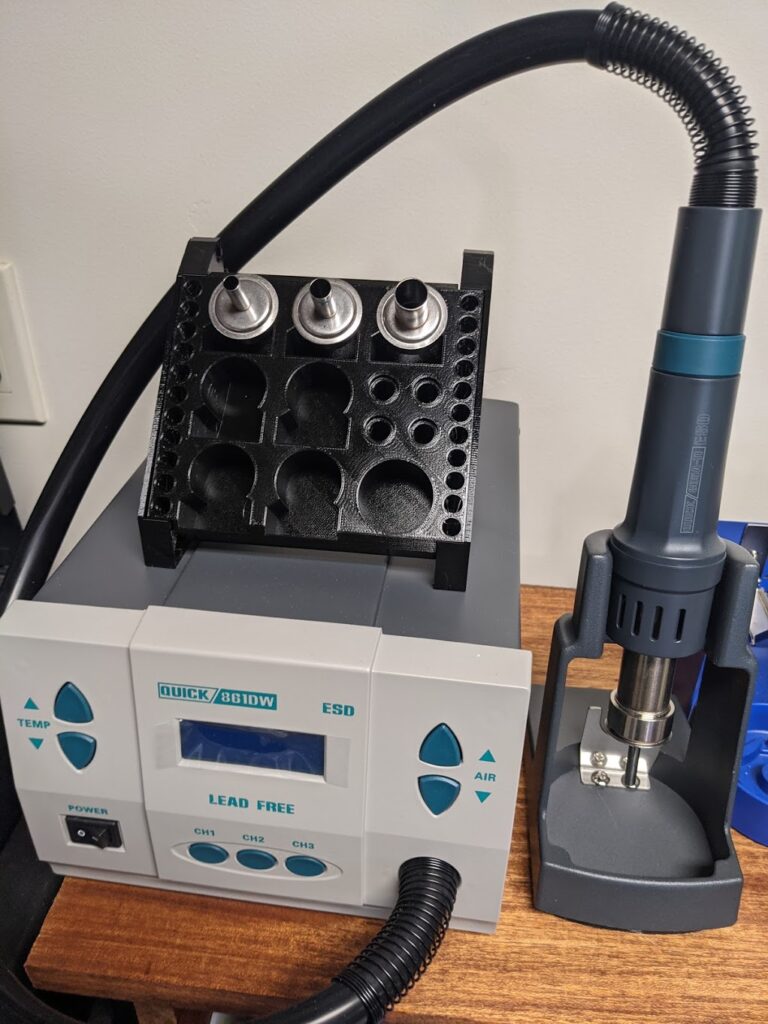
Hot air was immediately my favorite way of soldering, when I found out how much nicer it is do attach sockets this way rather than soldering 52 individual pins. And a few months later, I still really like this method for SMD PLCC sockets. But you have to do your due diligence after soldering and check if the legs are attached right:
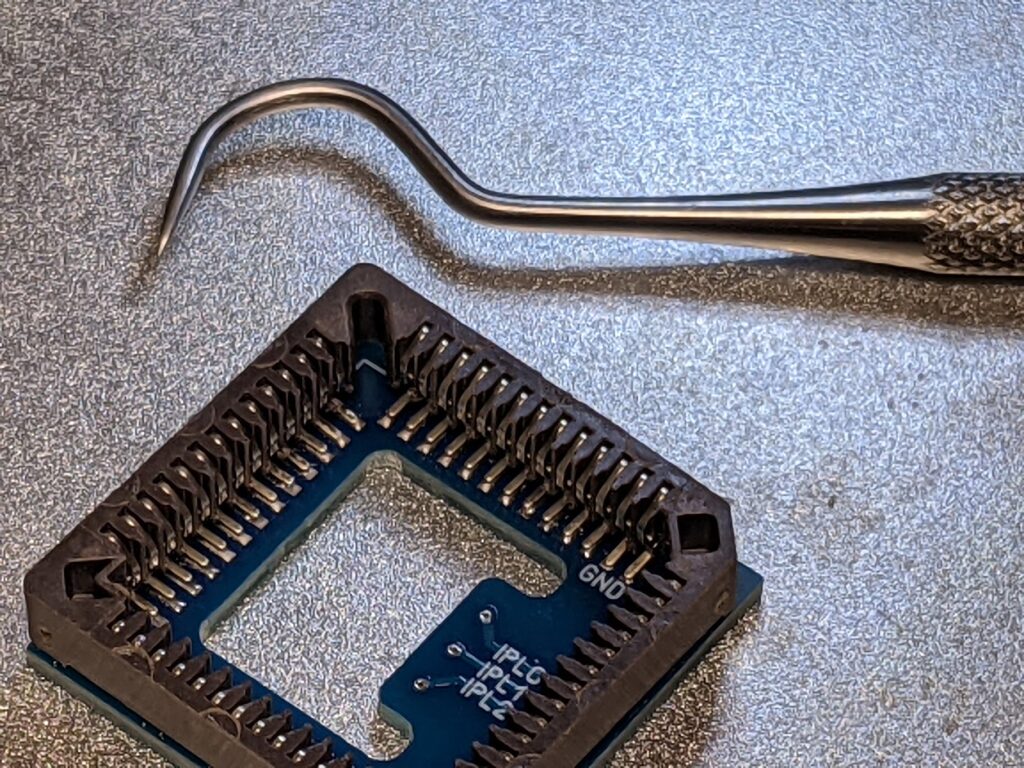
Tweezers, a pincer or in my case, a set of dentist’s tools really work wonders. These can be bought online for less than 10 bucks and they’re super useful to get into the small spaces.
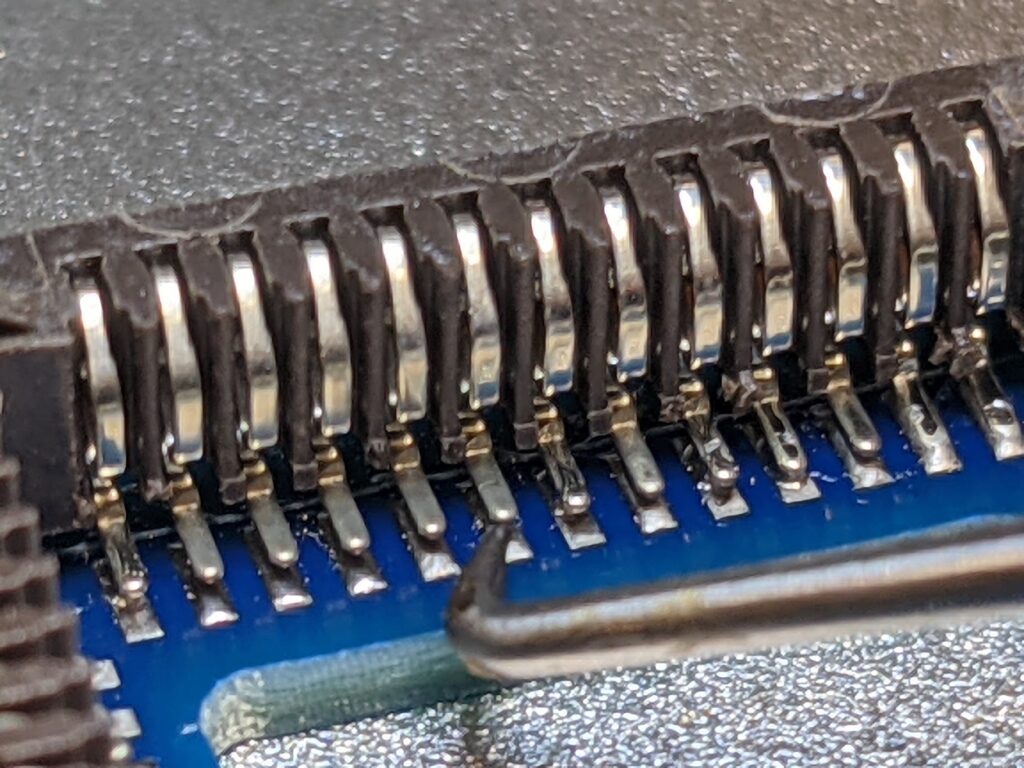
On the ikod.se adapter it’s actually OK if some pins are not perfect, you really only need to make sure that the ones with actual signals coming off of them, going to the diodes, are soldered correctly. But for stability and the sake of learning to do it correctly, I suggest to not take shortcuts.
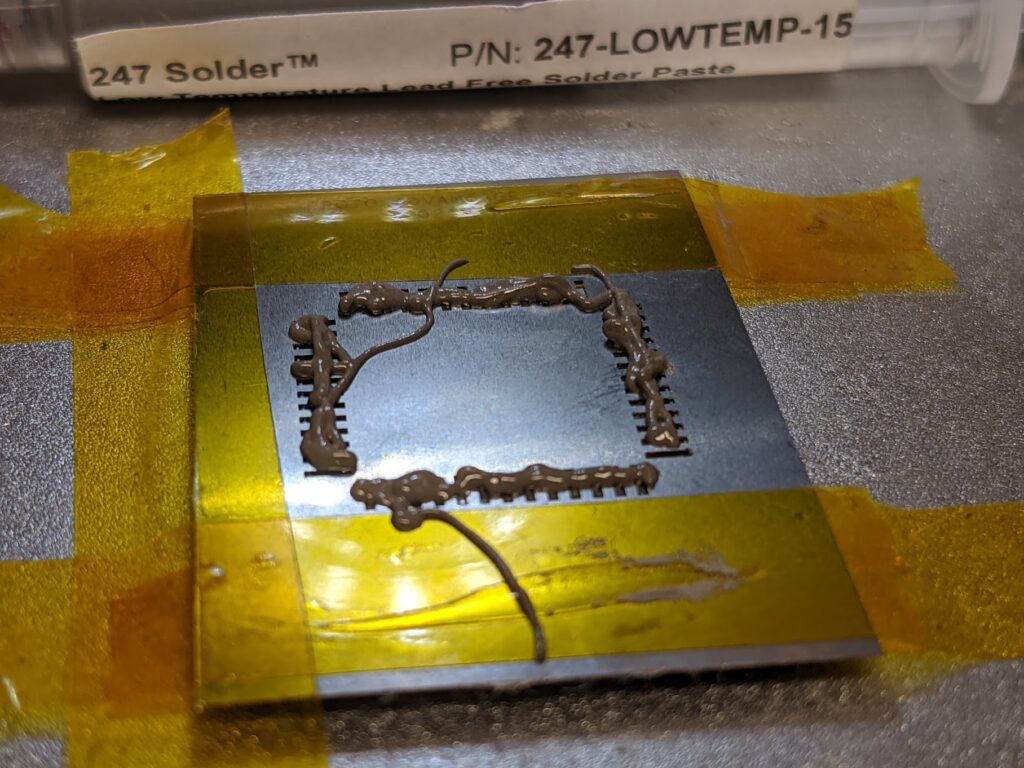
There’s a better way of applying solder paste than just smearing it across the pins: stencils. My first experiments, however, were so, so. The stencil and the PCB have to be fixed to keep them from sliding around. I used a few pieces of the kapton tape that I had lying around. The stencil I got from DigiKey didn’t entirely fit the pads on the ikod.se adapters’ PCBs. But… close enough.
Alright, let’s see how that went..
It didn’t come out perfect, but much better that just applying the solder paste with a syringe. But soldering with the hot air gun didn’t come out as great. Somehow the sockets were not even enough on the PCB so some pins did not attach to the pads evenly.
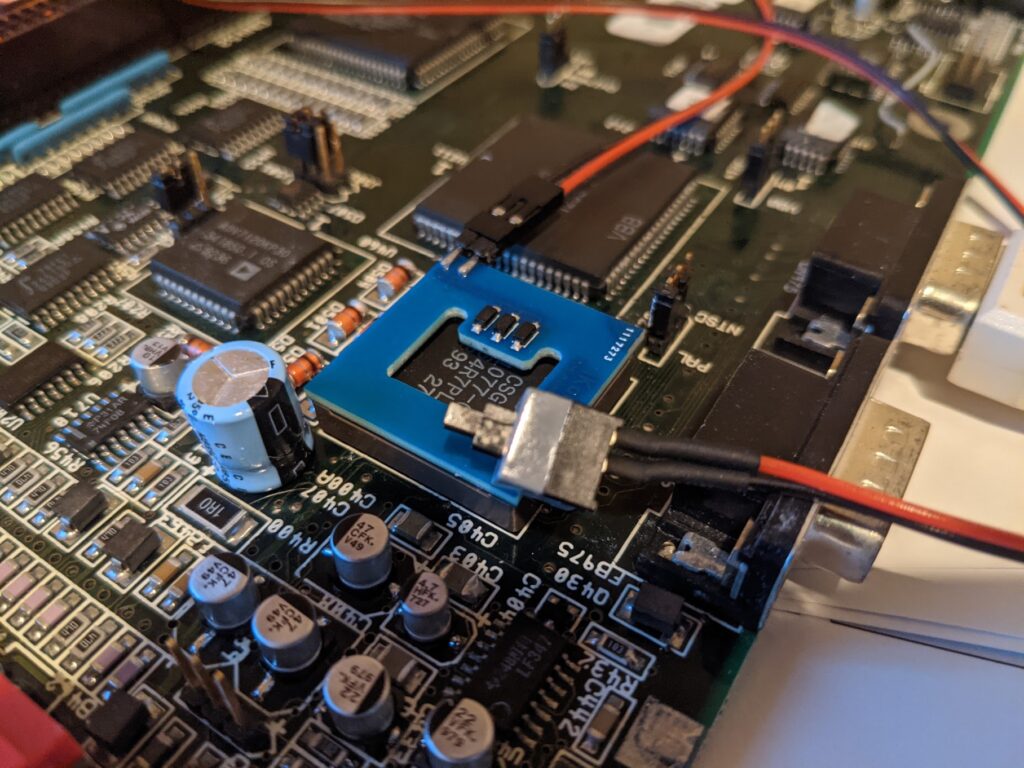
Time for testing… the adapter is plugged on top of Paula. Connect a little switch that we can use to, e.g. enter a debugger.
You can use it with any software that has an INT7 (NMI) handler. Some Assemblers have them. I think I read ASMone can use INT7 to interrupt hanging programs, but I didn’t verify. I used HRTmon 2.37 that I found on WHDLoad. It’s possible to embed WHDLoad into the Kickstart ROM and even interrupt while you’re for example at the boot screen or in the boot menu. I didn’t try that yet, but an easy start is to just load HRTmon from s:startup-sequence. And then, the big moment….
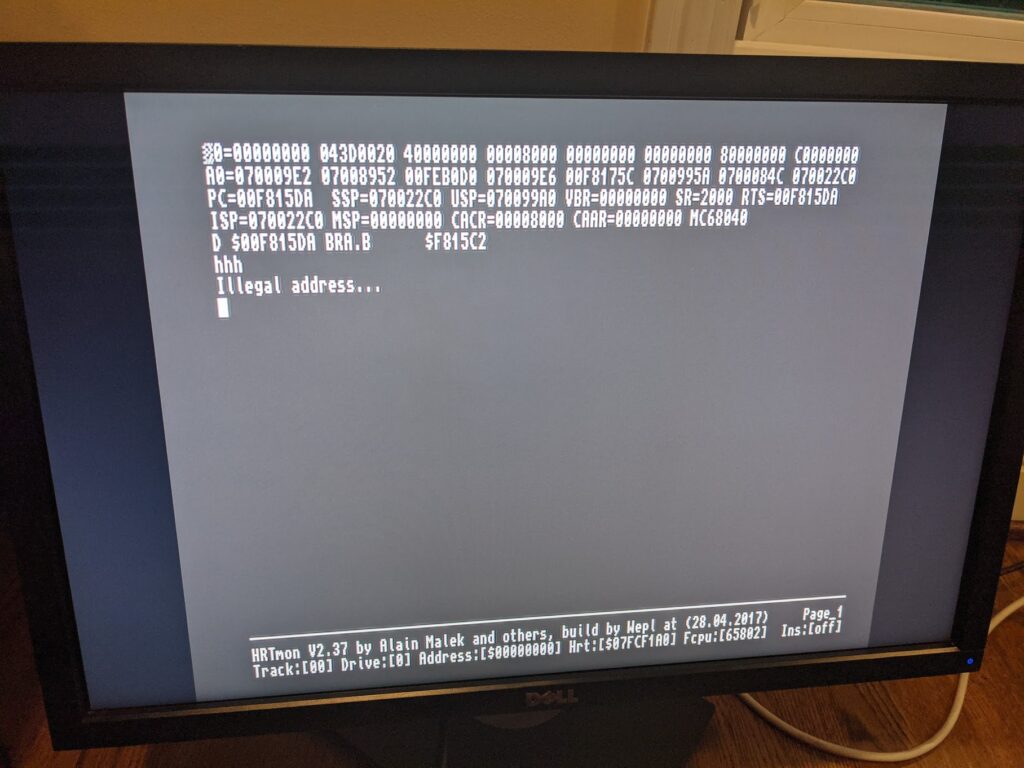
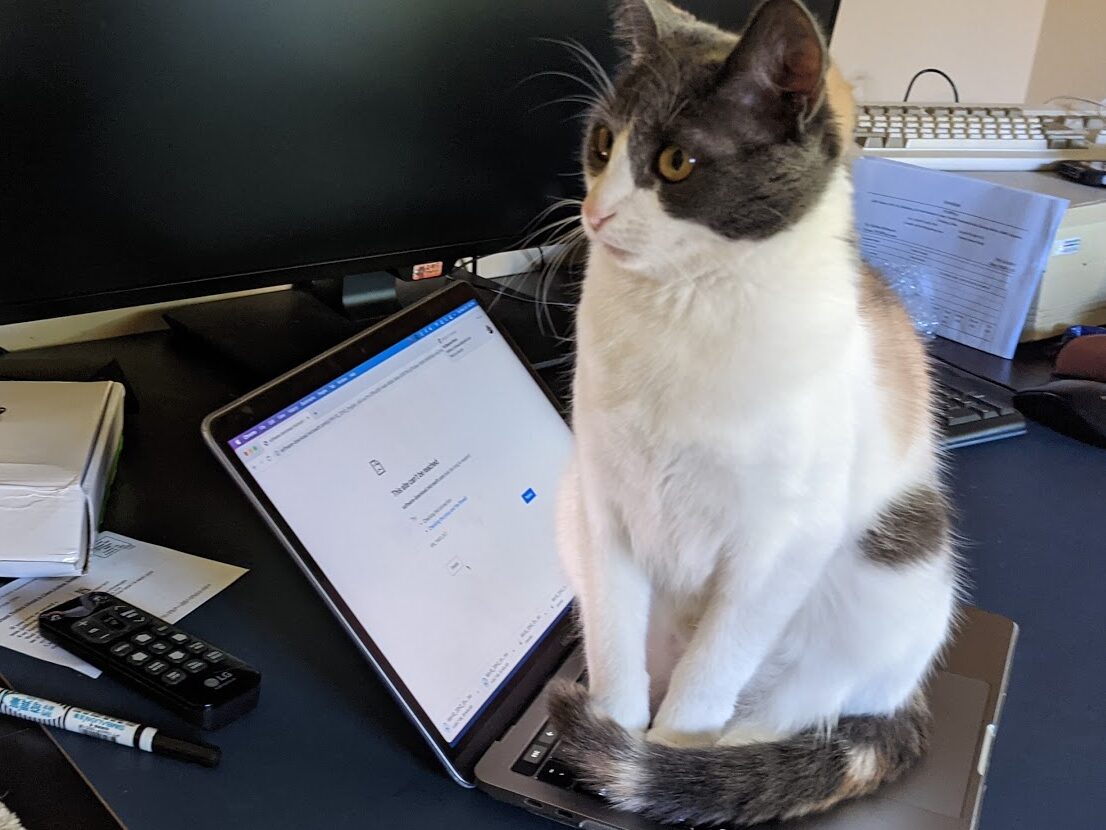
Great! That worked. Thanks to ikod.se and the authors of HRTmon. Even Katsu approves:
And if you need one of these, let me know… I have a few left over.
Thank you Guillaume for your awesome video: https://www.youtube.com/watch?v=0BuWf2aTLRc
Hi Stefan, good morning. , I am Francisco from Spain. Great invention to be able to adapt it to the Paula Chip. Nice job!
Would you still have any of these? I would pay well.
If you can please leave me an answer. Thank you.
Hello Stefan,
Is there any chance of getting one of these? Thank you in advance.
I will reach out to you