… come in threes, they say, or “Aller guten Dinge sind drei” in my native tongue German. And so I set out to make a third and final attempt at reliably delivering great 68040-to-68060 adapters. Remember, earlier in my adventure I built one of these adapters with a PCB made by OSHpark. I was so excited, that I sold it on eBay and started to make another one. And failed. And another one. And… Well, you get the story here.

In my second attempt I found out, that I had forgotten to refresh the fill zones in KiCAD – What a rookie mistake, that left half a dozen 68060 PGA sockets dead, soldered onto PCBs where VCC and GND were never connected to the mainboard. The good news? No Amigas, and no 68060s were harmed in the production of that episode. But I promised, I would get this working. At least to myself. I had also disliked some of the characteristics of the old design.
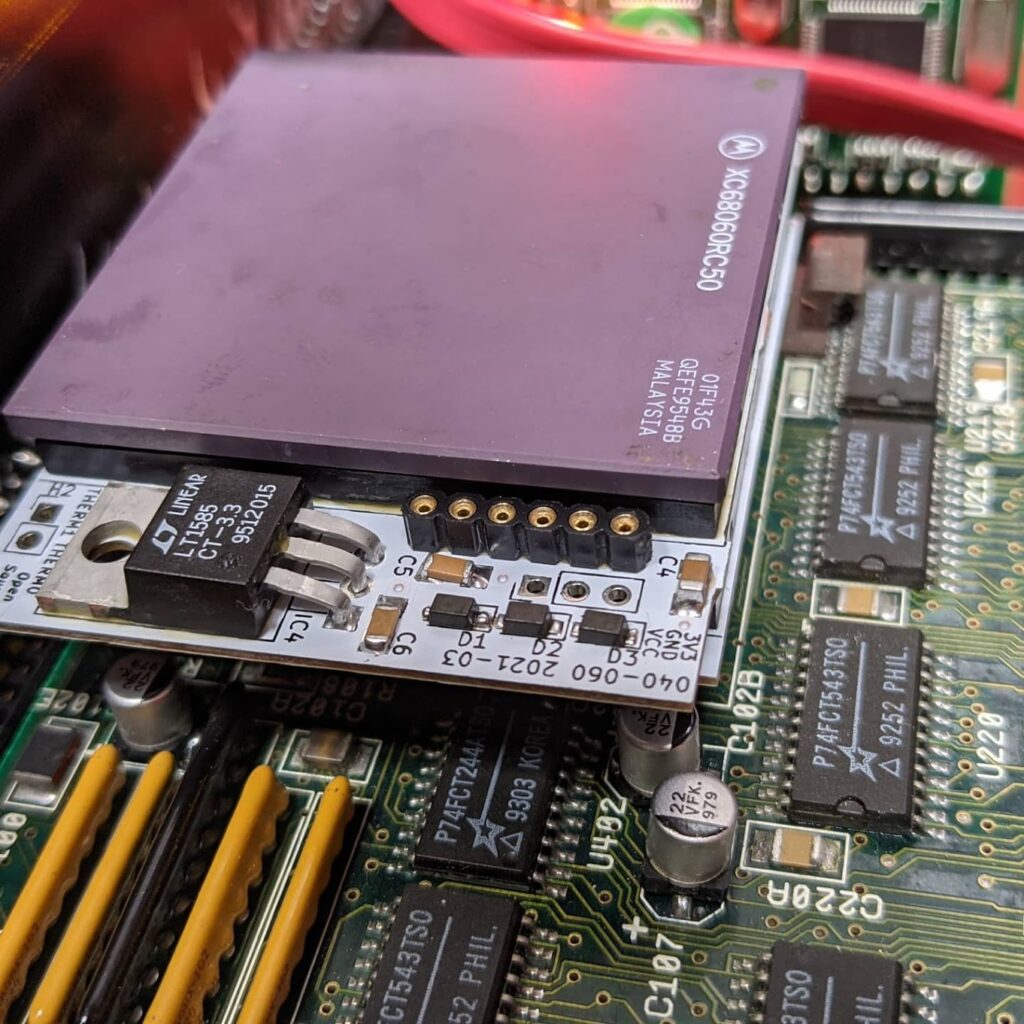
- I had to dremel the sockets I got into shape because they tried to occupy the same space as the other parts on the PCB, in clear violations of the physical laws of this time-space.
- The interconnect between the two boards was oddly misaligned with the rest of the pins, making it impossible to use the substrate of the socket to keep them nice and tidy (and giving another reason for more dremeling. UGH)
- Compared to the original design the KiCAD version by richx used single resistors instead of resistor networks. For the sake of space, those could be replaced by nice little 0603 RNs.
An evening with KiCAD and a few more days of waiting on a PCBway delivery, and here it is:
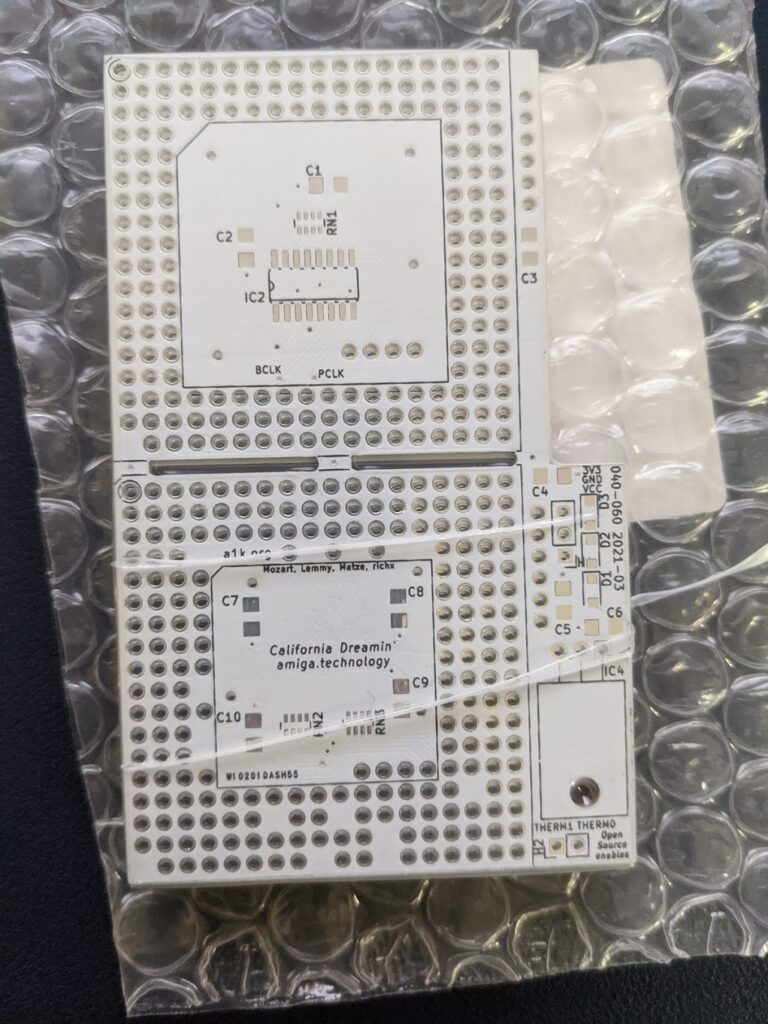
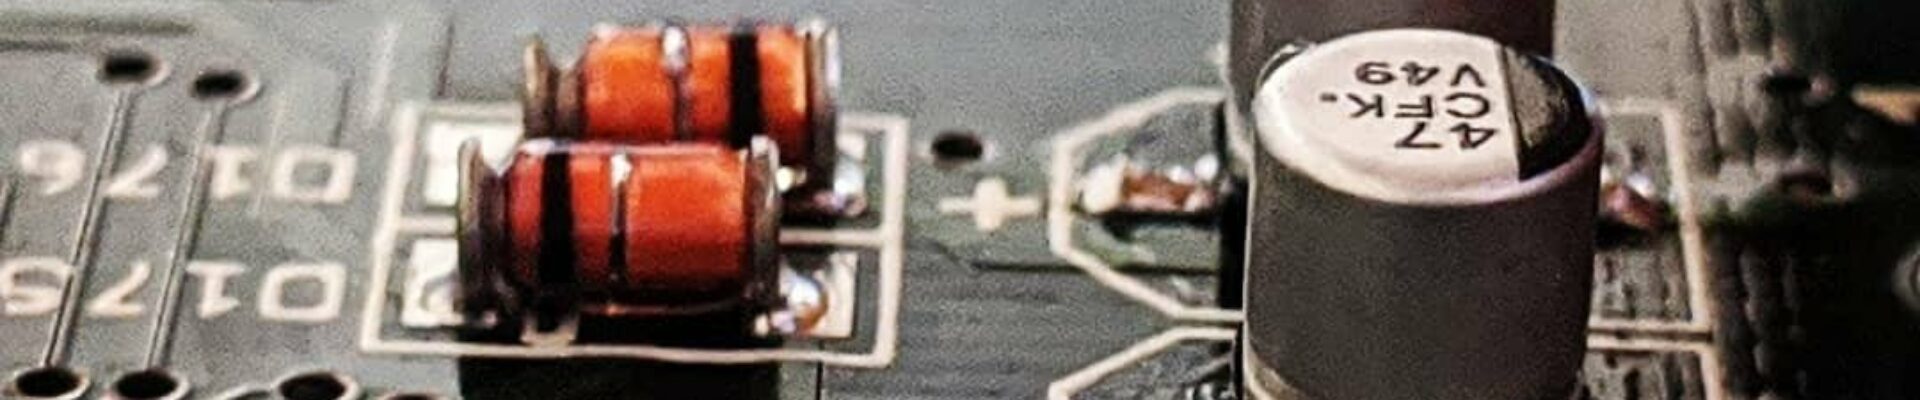
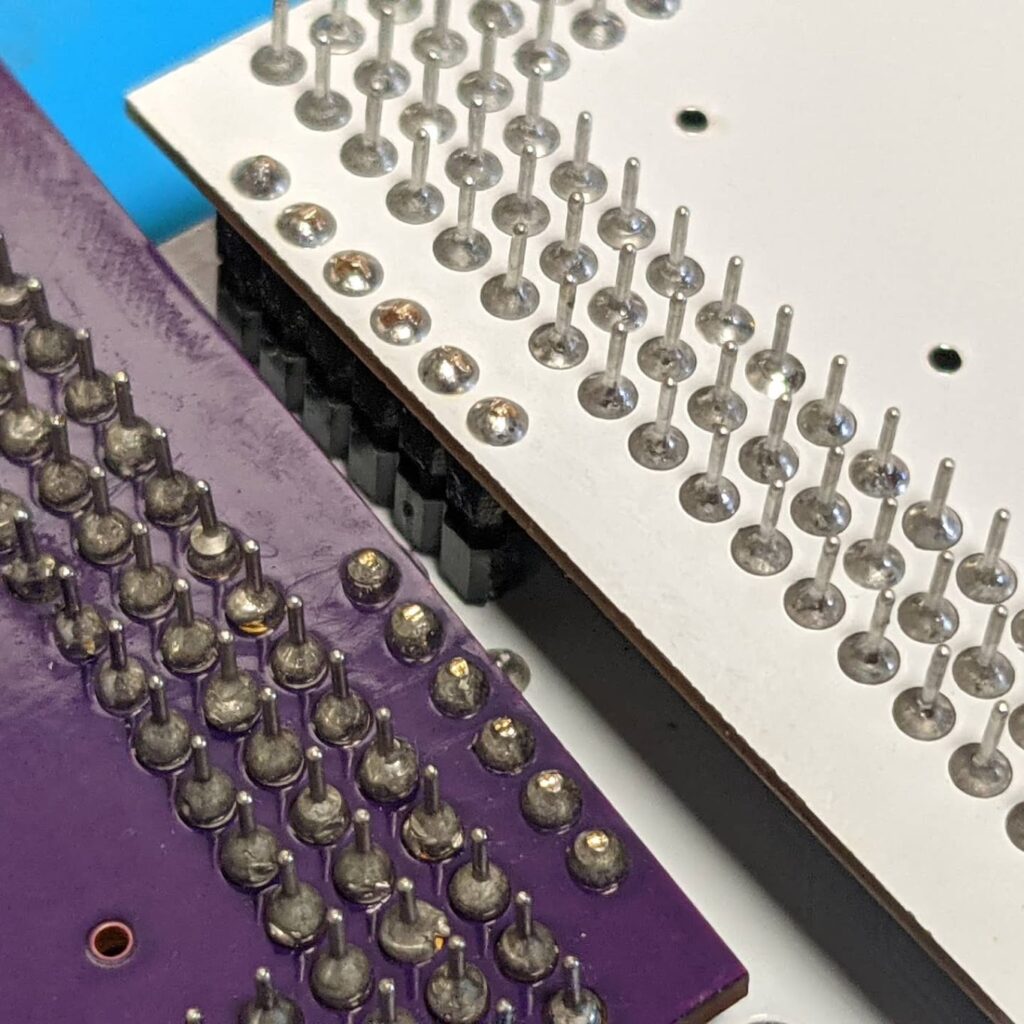
I chose the 0603 resistor networks because I had a roll of 4k7 ones sitting in my electronics bin, and they give a nice clean arrangement on the PCB. This time I checked that the VCC and GND connections are actually there. You can see it in the picture below, even with an all white PCB. So let’s get soldering.
Now, since I have bought my Hakko soldering iron, I apparently never changed the temperature from the default 750 degrees Fahrenheit (400 degrees Celsius). But this time something dawned on me.
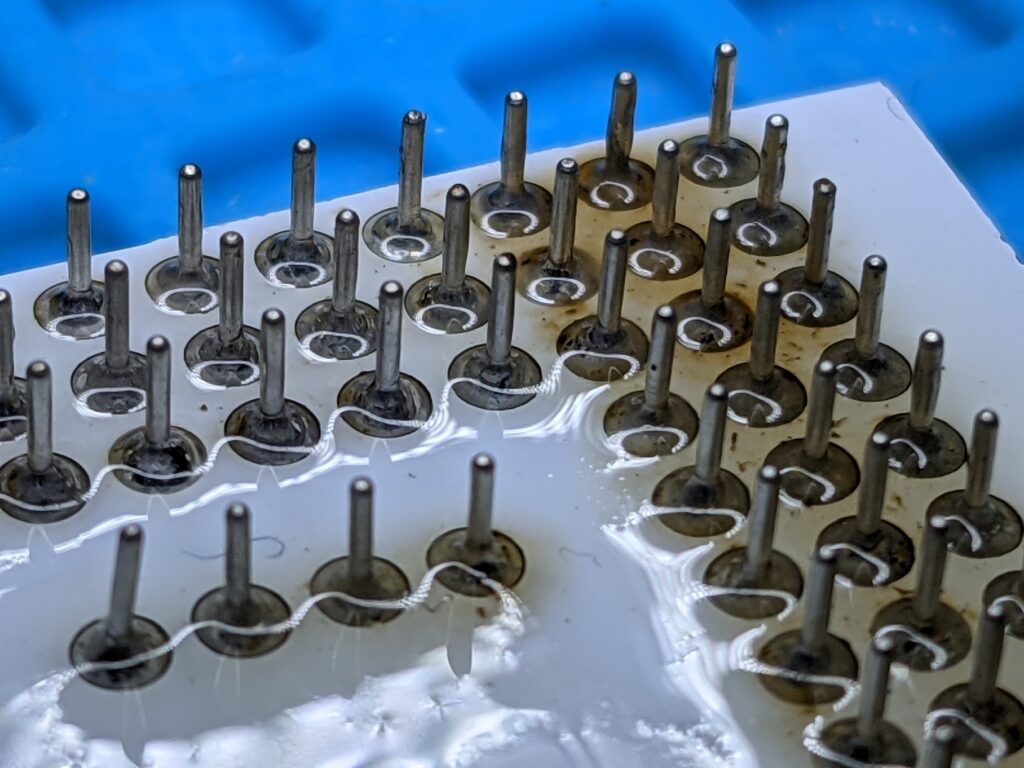
My flux kept getting really brown and dirty, but it also had little particles in there, particularly when I was soldering sockets (a-ha!). So I tried to lower the temperature to see if the problem went away. Adam P. taught me that the default is great for RoHS compliant solder which, due to the lack of lead, has a significantly higher melting point and is harder to solder. For my hobbyist productions here I am going with the traditional 67/37 tin/lead alloy from Kester, so I could lower the temperature. Pushing a few buttons on the Hakko FM203, doesn’t work. Really, 4 buttons and I need to go find the manual? Alright.
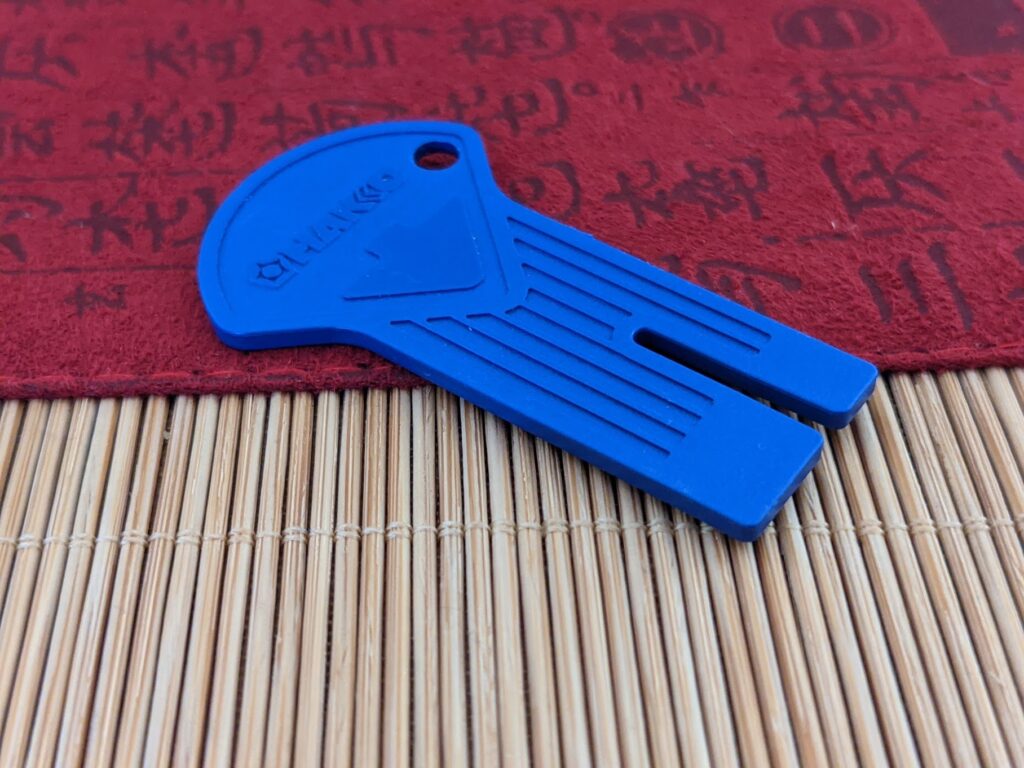
Wait, I need an electronic key for this? I never saw that thing. How on earth? Well, about 30min later, I did find it on the bottom of my drawer, it had been sitting there for the last 7 months unnoticed. And, believe it or not, changing the temperature even just to 700F or 370C makes a significant difference in how clean your operation looks in the end.
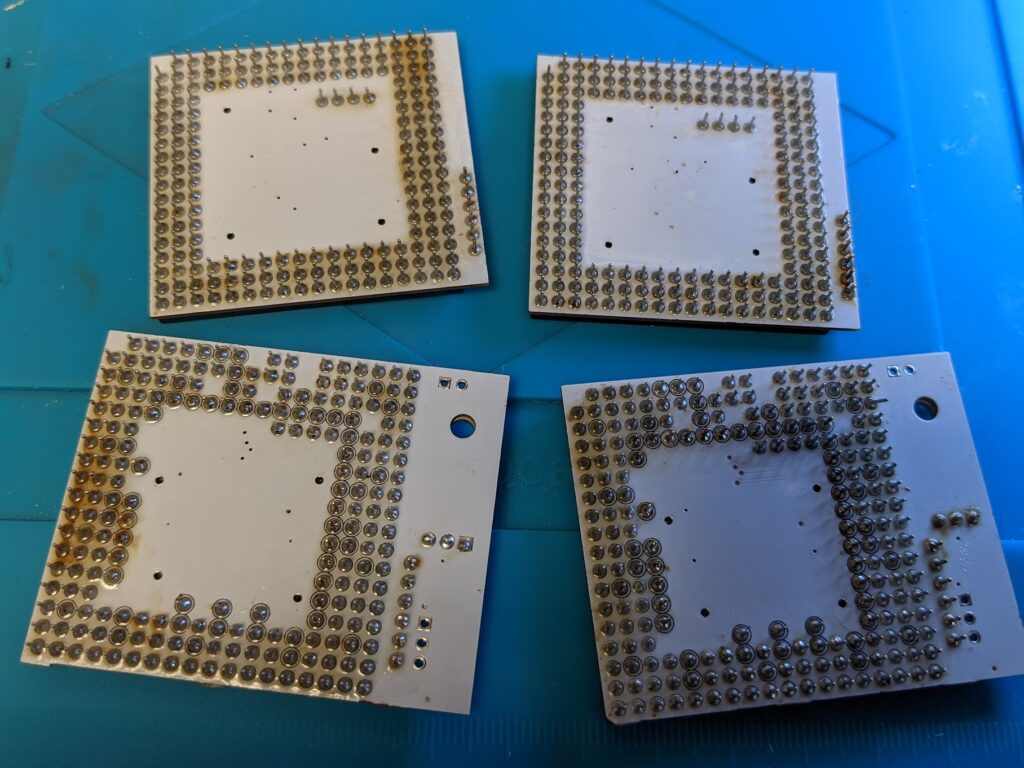
For orientation I like to look at the things I’ve built before. So I found my non-working OSHpark adapter … What a profound difference 6 months of practice have. I am almost ashamed to post the before & after comparison, but this is an honest description of the journey and so it should not be held back. A year ago, building an adapter like this seemed like magic to me. Half a year ago, it seemed like maybe it was too big of a challenge, but nowadays, it’s just a bit of patience and part of a weekend day spent in the garage.

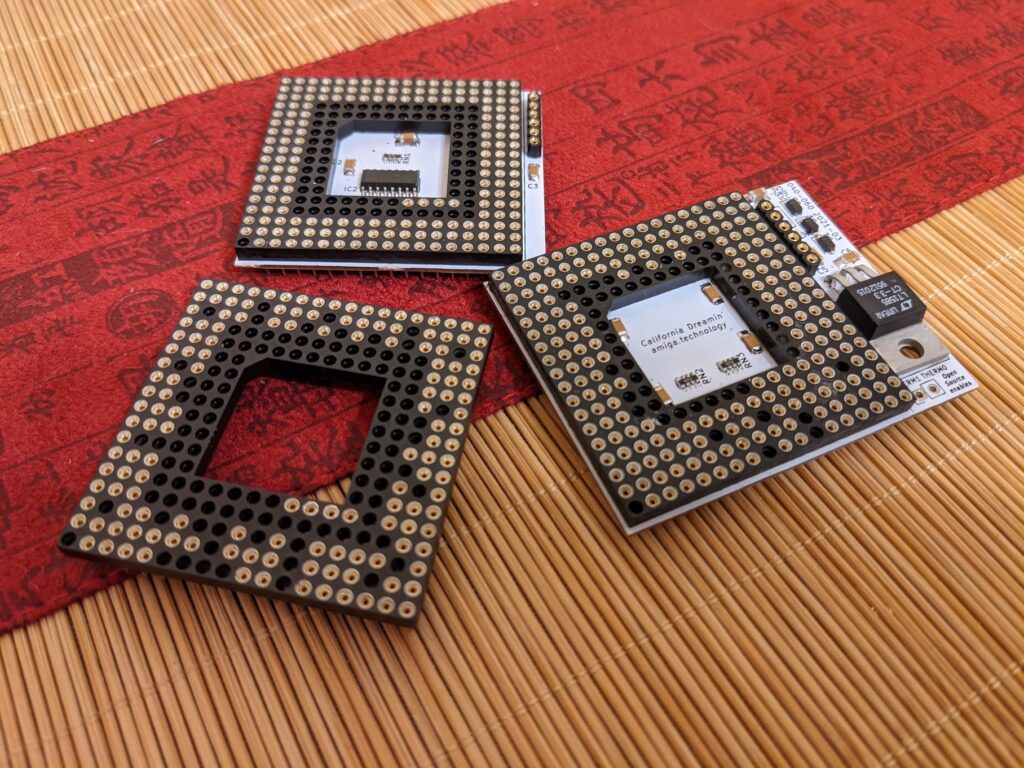
As mentioned before, I put a third socket in the middle of the two PCBs to physically separate the pins. The use of a third socket adds a bit to the height of the adapter, and will make it unusable in an Amiga 3000 for space reasons. Although I don’t know if getting rid of the third socket in the middle would shrink it enough to actually fit. Probably not, but I don’t have a machine to test.
Finished! At last! Now the big question is, not will it blend, but: Will it work?
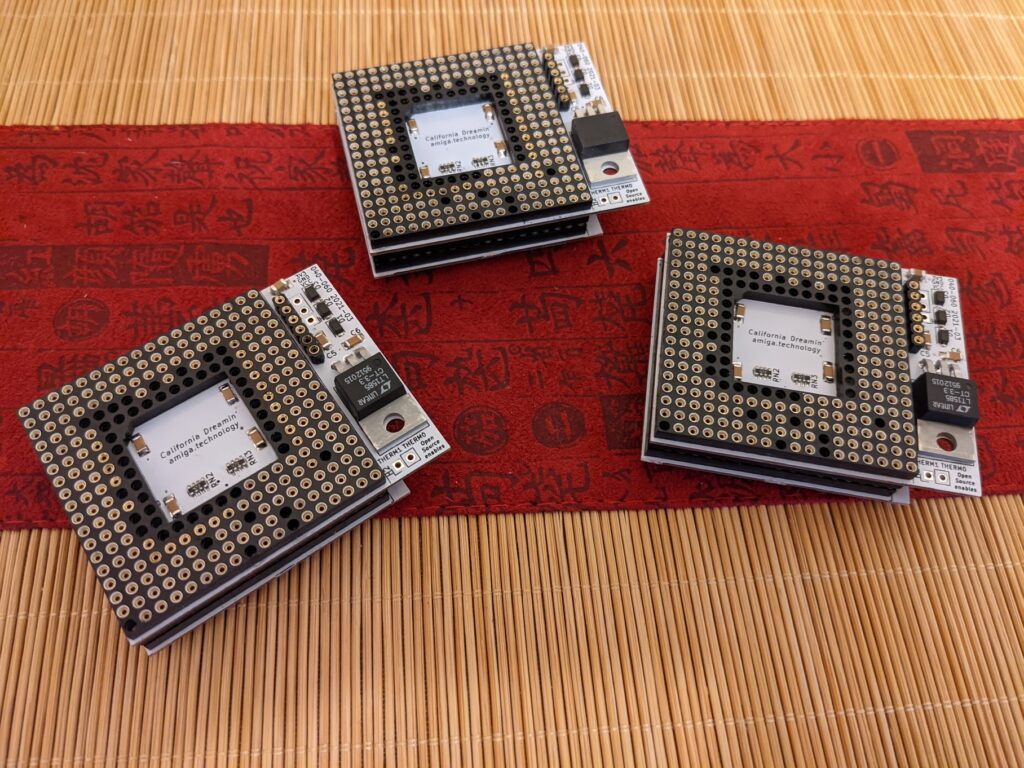
Hold your breath and… after an enormous journey to produce another one of these adapters, that lasted a good six months:

But, as a software engineer I know that nothing really counts if it is not reproducible, so I had to get right back to it:
This should be quick (famous last words), and a weekend later, we have, not one, not two, but three 68040-to-68060 adapters.
And to make this project available to more people, I have added my version of the PCBs to github: github.com/reinauer/68040-to-68060. Go, check it out. I hope you will love the interactive BOM viewer as much as I do. I will post my further updates in the github. Some ideas include:
- Getting rid of the need for the huge voltage converter and use smaller parts
- Move the logic on the side of the top socket to the middle (challenging)
- Some actual solution for the THERM pins and a fan
- Come up with a better idea for pin separation than the third socket
If you have other ideas, or a clever solution for any of the above, please let me know. Until then, I have something more important to do:
Seeing a ‘060 run with a mere 4MB Fast RAM hurts. 🙂 But otherwise, nice job!
No real systems were harmed in this way, at least not permanently. 🙂 🙂 The system was on the bench for debugging at the time
Pfew, the title ‘All good things …’ got me there for a moment. Almost thought you quit this blog or any other activities concerning our beloved machine 🙂 Thank God, that’s a negative. Keep up the good stuff Stefan 🙂
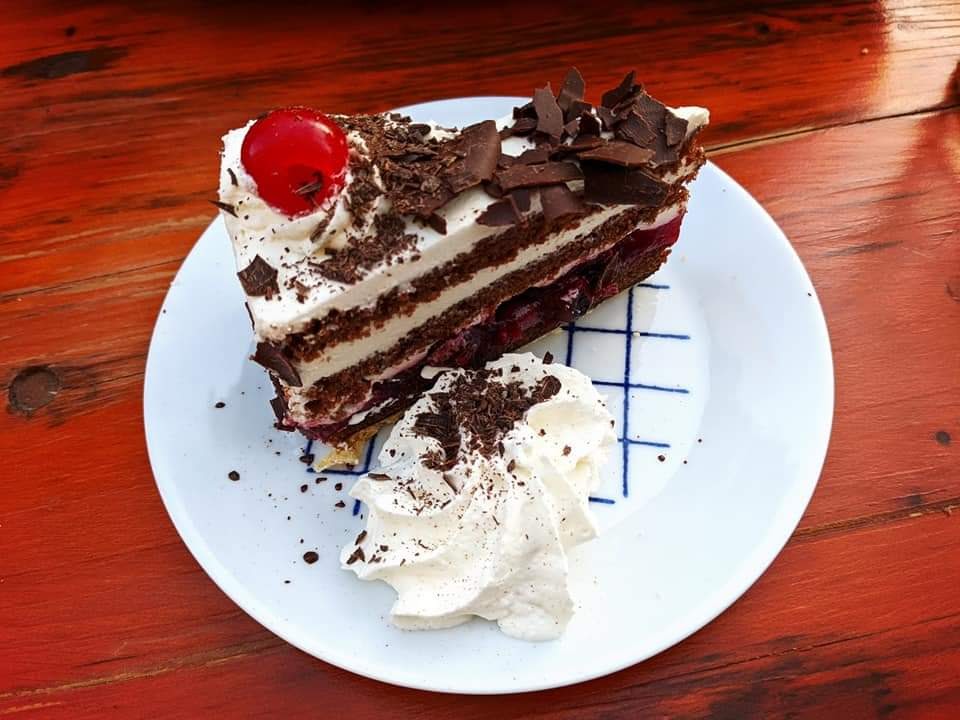
PS Is that a Schwartzwalder Kirsch?
Haha, I am in way too deep over my head now. Apologies for the scare. And yes, it is a Schwarzwaelder Kirschtorte (From the new German place that had opened here in Mountain View)